Robotics, Computer Vision, Machine Learning

Month: March 2017

Simulating Robotis Mini in Gazebo

In this post I will extend the URDF model I created in the previous post to be used to simulate a Robotis Mini robot in Gazebo ROS. I will include dynamic and other properties that are necessary for the simulation.

First, I will add collision bodies to each of the links of the URDF model. Gazebo uses the collision bodies to compute contact points / collisions between surfaces. The URDF format has two ways of defining collision bodies: as a set of geometric primitives (cubes, spheres, cylinders) or as a mesh model in stl or collada format. My first idea was to use directly the same mesh files I used for visualization (the ones provided by Robotis). However, the complexity of the computation of collisions grows with the level of detail of the collision body models (i.e. the number of triangles of the mesh model if it is not a geometric primitive). And the mesh models for visualization contain a lot of details! Using these highly detailed mesh models would slow down the simulation. Additionally, many of these details, like the holes, are useless for the collision computation.

Therefore, I used MeshLab to create a second mesh file for each robot part containing a lower resolution mesh model. Meshlab provides both a convex hull computation (for convex shapes) and the filter “Quadric Edge Collapse Decimation” that are very useful to reduce the complexity of a mesh model. I saved the simplified meshes with the same name and the suffix “_s”.

Next, I added some dynamic properties to the URDF model. To the robot links I added friction and inertial properties (mass and inertial matrix). To the robot joints I added transmissions, joint limits and maximum effort and velocity.

Then, I added the gazebo_ros_control plugin to the URDF model and defined a set of ROS controllers for the joints of the simulated robot. These controllers are loaded through a ROS controller manager node. I defined the controllers in a yaml file in the “config” folder inside the robotis_mini_control package.
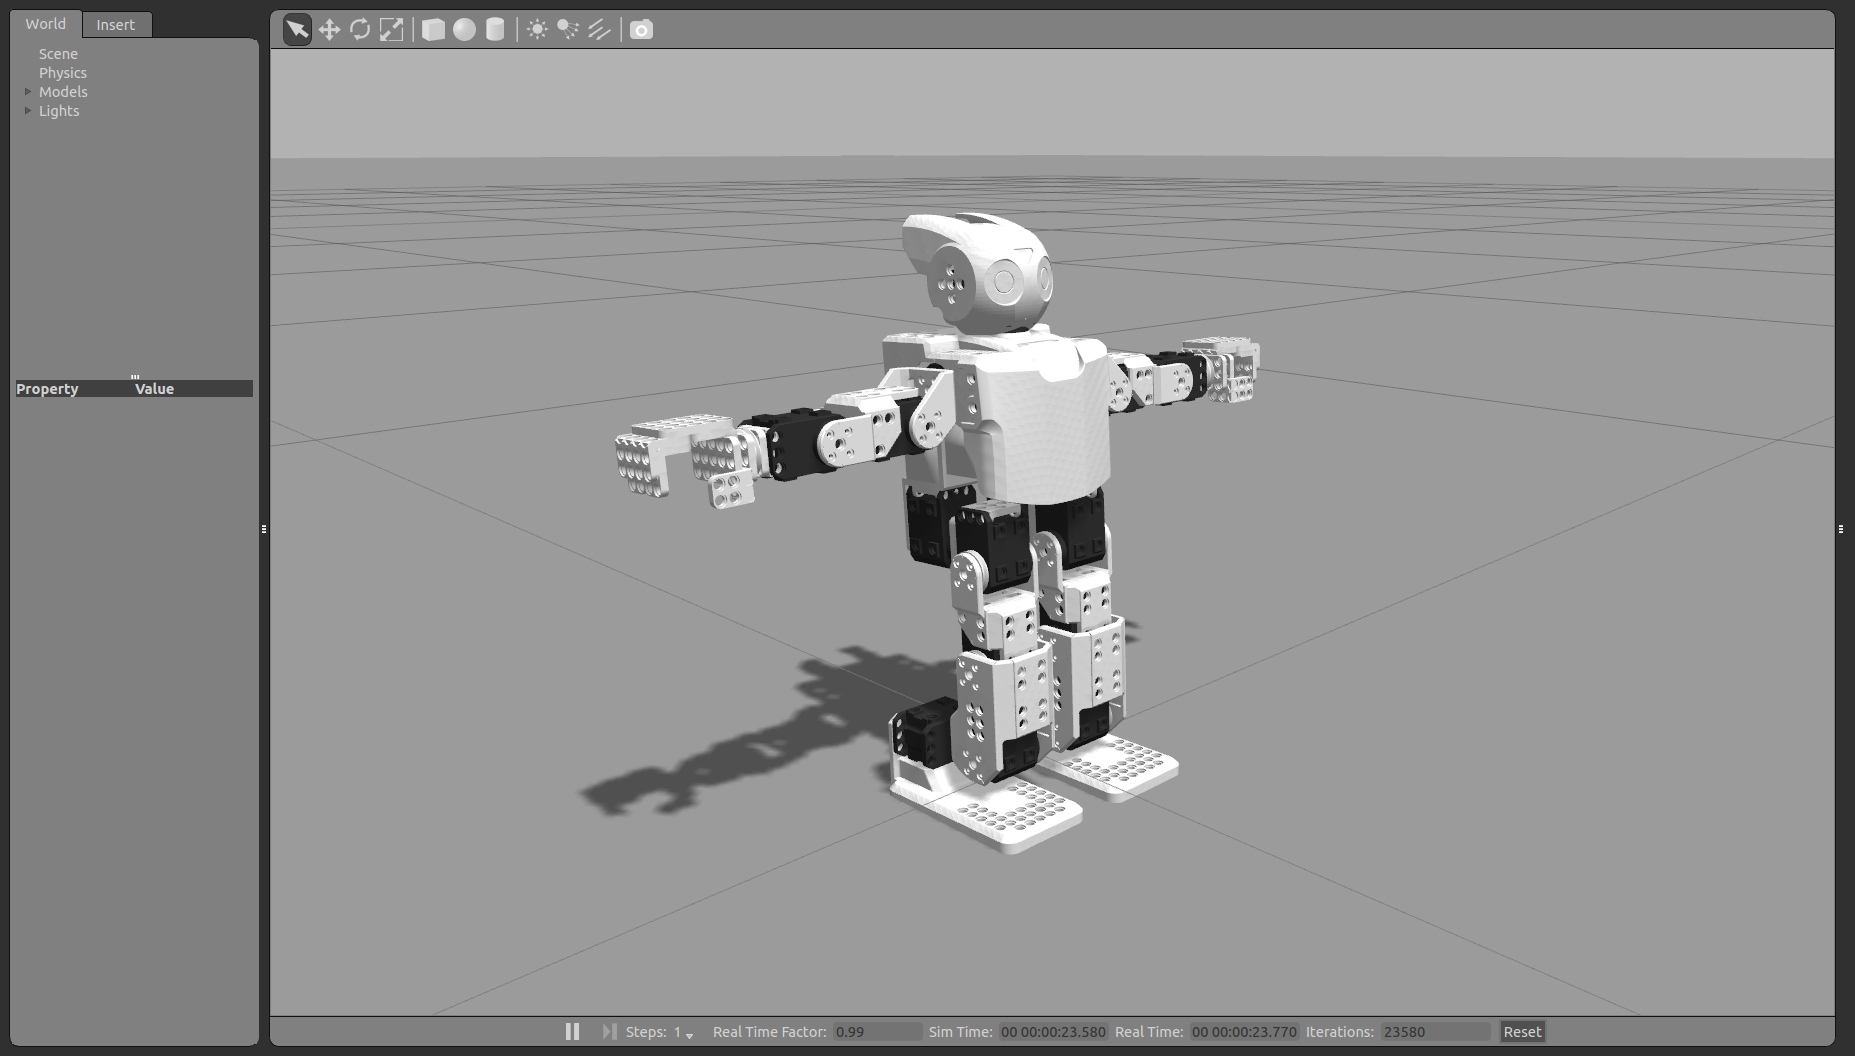
 

Gazebo simulation of the Robotis Mini robot

Gazebo simulation of the Robotis Mini robot

Finally, I created a new package called robotis_mini_gazebo inside the robotis_mini_ros meta-package. This package contains a Gazebo world model and launch files to load Gazebo, the URDF model and the joint controllers. The world model is currently almost empty: it just defines a new initial viewing pose closer to the robot. I can now launch the execution of a simulation with my Robotis Mini model with the command:

roslaunch robotis_mini_gazebo gazebo_and_control.launch

Well, the simulation is up and running, I just need something to simulate! That means, I need a method that sends commands to the simulated robot, records the outcome of the execution (reward, cost) of these commands and learns the best set of parameters to achieve a task. It is getting interesting!

Creating a bridge between Robotis Mini and ROS

In the last post I explained how to interface the Robotis Mini robot with python using the pypot library and a Robotis Mini module I created. In this post I will make use of this functionalities to connect the robot to the ROS environment. My goals are:

  1. read motor states and publish them to ROS as JointState messages
  2. get motor commands from ROS (controllers) and send them to the robot
  3. visualize the robot on RViz

Therefore, in this post I will explain how I created a ROS node that will take care of 1) and 2). This node will have to create a RobotisMiniPoppy object (pypot library) and use it to read/write to the robot, and create and use the corresponding publishers/subscribers to ROS.

Then, I created a URDF model of the robot. I found some existing URDF models for the Robotis Mini that I could use to start with and extend. The URDF will use the CAD models provided by Robotis for each robot part.

Finally, I created two launch files:

  • one to connect to the real Robotis Mini robot and visualize it in RViz
  • a second one to visualize in RViz a virtual Robotis Mini. Its joints can be manually set using the joint_state_publisher node GUI.

I created a meta-package robotis_mini_ros that contains two packages: robotis_mini_control (for all the control related stuff for the robot, also for the bridge node to connect to the real robot) and robotis_mini_description (for the URDF and the launch files). It is publicly available in this repository: https://github.com/roberto-martinmartin/robotis_mini/ This github repo also “contains” the pypot module I created for the RobotisMiniPoppy pypot code as a submodule (a submodule in a git repository is like a link to another repository; it allows you to match and pack together versions of both repositories).

RViz visualization of the Robotis Mini Robot

RViz visualization of the Robotis Mini URDF model

To launch RViz and the bridge to the real robot I just execute:

roslaunch robotis_mini_descriptor real_display.launch

To launch RViz and visualize a virtual robot I execute:

roslaunch robotis_mini_descriptor mockup_display.launch

To recap, now it is possible to:

  • connect to the real robot, send commands and query the state of the motors
  • connect the robot to the ROS environment
  • use the robot URDF model that defines the kinematics of the robot in combination with the motor values (joint values) to estimate the pose of each link of the robot
  • visualize the real or a virtual Robotis Mini robot in RViz

So what is next? The goal I am pursuing by connecting the robot to ROS and defining a model of the robot is to be able to simulate the robot in Gazebo (ROS physics simulator) so that I can use this simulator to generate and collect data necessary for any machine learning algorithm. The idea is that if I can simulate the robot in Gazebo, I can easily switch to the real robot whenever I want to test the results of the learning process on the real Robotis Mini, but I can leverage the simulator to generate large amounts of data. In the next post I will then develop the necessary models to simulate the robot in Gazebo.

Using the PC as motor controller through USB2AX and pypot

In this post I will report on my steps to connect the Robotis Mini to my PC. I will use the PC to 1) read motor state, and 2) send motor commands.

In previous posts I reported on the physical connection between the PC and the motors through the USB2AX. Now we need to develop a program that sends and receives information to/from the motors through this USB2AX. There are several libraries implementing the dynamixel protocol to read/write to motors. However, I found pypot, a python library developed by the Inria Flowers Robotics Group  in France, which directly takes care not only of the low level communication to the motors, but also provides very useful “higher level” interfaces to define robots from groups of motors. And all of it in python, so it is easy to use, to test (using for example a ipython console) and to program with.

First, I was playing around and getting familiar with the library and its possibilities. Then, I created a python module that defines the motor structure of the Robotis Mini and makes it available to the pypot library as a new robot creature. This module can be found here: https://github.com/roberto-martinmartin/robotis_mini_poppy/ . The module is very simple and has two main goals:

  1. define the RobotisMiniPoppy class deriving from AbstractPoppyCreature class, which makes it to inherit all the basic functionalities of the base class to read, write and control motors
  2. provide a json file with the configuration of the robot (motors, their IDs and configuration)

Because when I connect the USB2AX to my PC it always gets the /dev/ttyACM0 port, I hardcoded it in the json file. However, it could be that in another computer the assigned port is different.

After I installed this module, I could use pypot with my Robotis Mini robot! I was playing around with the pypot + my RobotisMiniPoppy class in ipython. I was able to:

  • read and wrote motor values
  • activate, deactivate and change the color of the LEDs of the motors
  • record a robot trajectory executed kinestetic teaching (manually moving the robot motors) and replay it afterwards

My next step will be to add another level of abstraction and ROSify the robot. I will use pypot to create a bridge between ROS and the Robotis Mini robot. This will allow me to use ROS packages to control, visualize, record trajectories in rosbags, …